(Walking the) Planks
Posted By Russ Emerson on March 29, 2010 at 2:45 pm
It’s been a challenge, but I’ve completed the planking on the Launch, more or less successfully.
The Model Shipways kit of Bounty’s Launch, being a very modern product, was developed with CAD/CAM technology. One of the benefits of this is that the planks could be pre-cut to fairly accurate shapes.
See, here’s the thing about the planks on a ship’s hull: they are never straight. I mean, if a boat had a rectangular hull, sure, they could be straight… but ships and boats are usually quite rounded; the planks have to be contoured and tapered to conform to that shape.
Now, the kit I’m working on does allow for the modeler to develop his own planking from scratch, which would be great if one intended to leave it as bare wood… but I have no such intent, so I used the pre-cut planks provided.
As with the earlier framing, the planks had to be bent, though not as severely as the frames. A good soak in freshly boiled water was essential, with most of the bending done by hand, after which the planks were clamped onto the building jig and frames to dry.
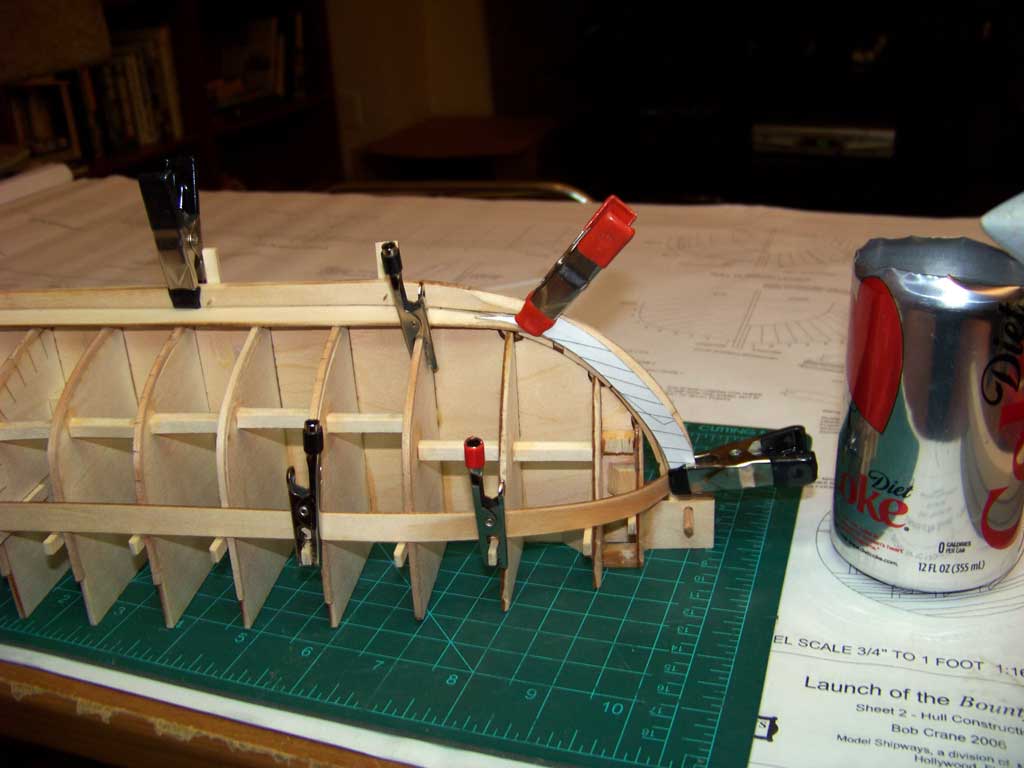
[Click for larger]
A pattern cut from the plans was used to make sure the planks lined up properly. Adjustments were made, as needed, by sanding.
For the sharper bends some of the planks required at the bow, a bit more heat was required. Since the planks are slightly wider than the bending tool I used for the frames, a slightly different solution was called for. I dug through the attic and found a tool from my days of building radio control airplanes — a covering iron from the makers of Monokote.
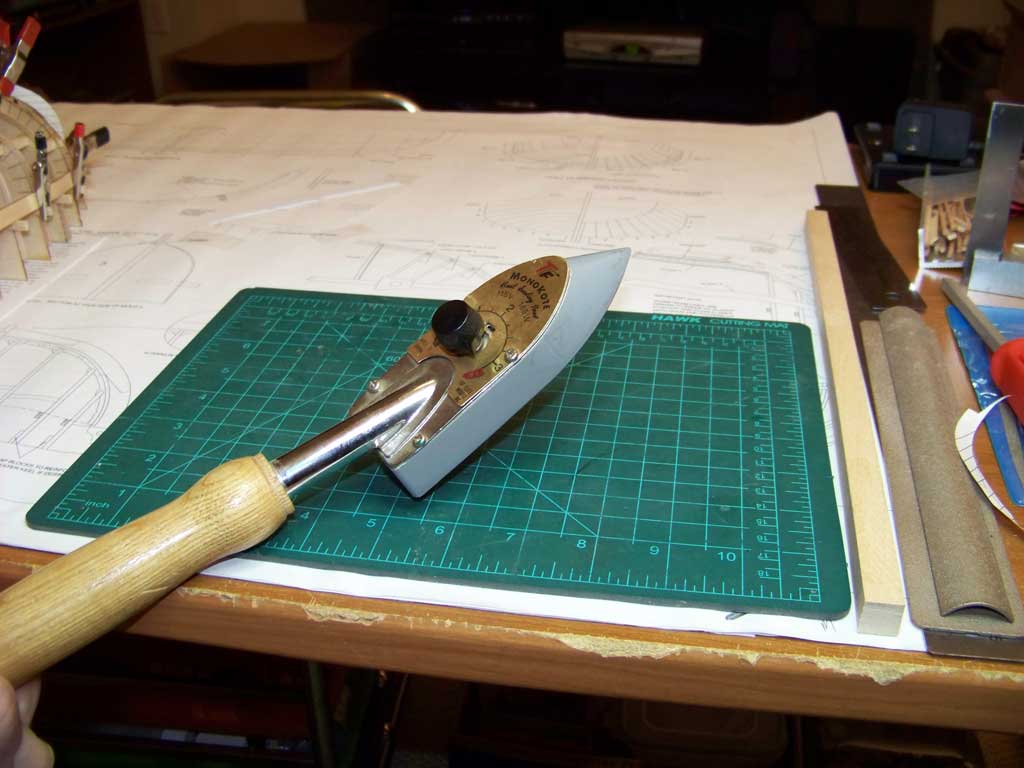
[Click for larger]
Intended to iron on and shrink mylar, it has a nicely rounded shape at the nose, and gets hot enough to generate steam in the soaked planks. Fairly tight curves can be achieved, specifically needed where the planks meet the stem.
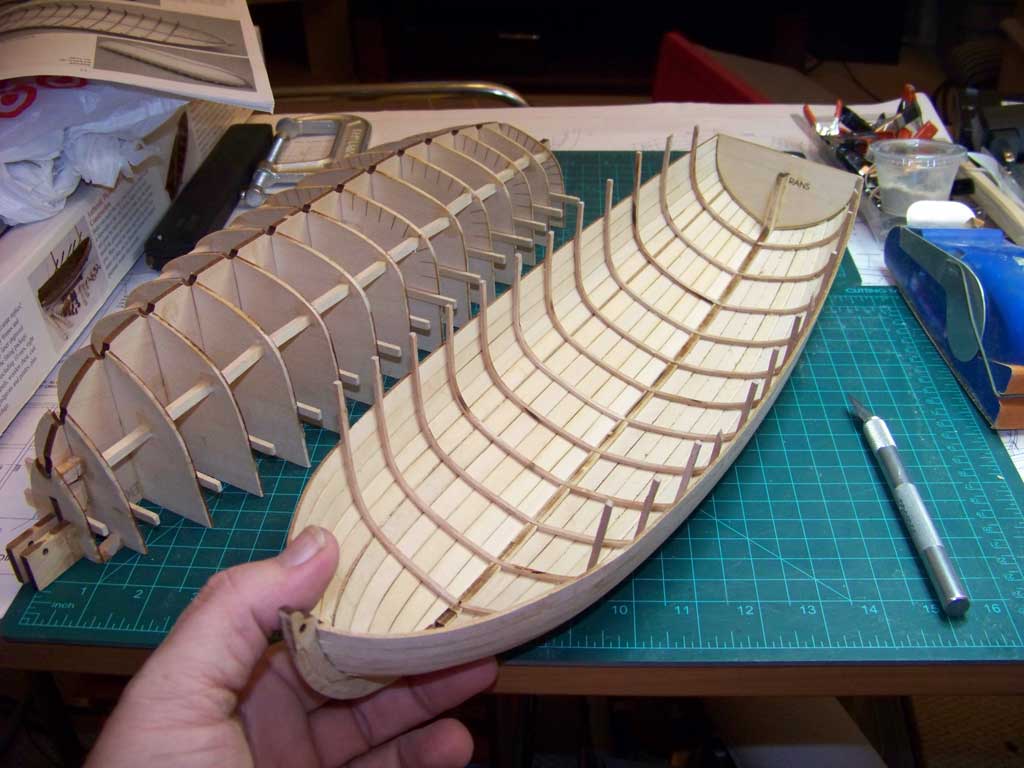
Planking was begun at the top and bottom with the uppermost or “sheer plank” and the garboard strake next to the keel, and progressed plank by plank towards the center, or “shutter” plank, near the turn of the hull.
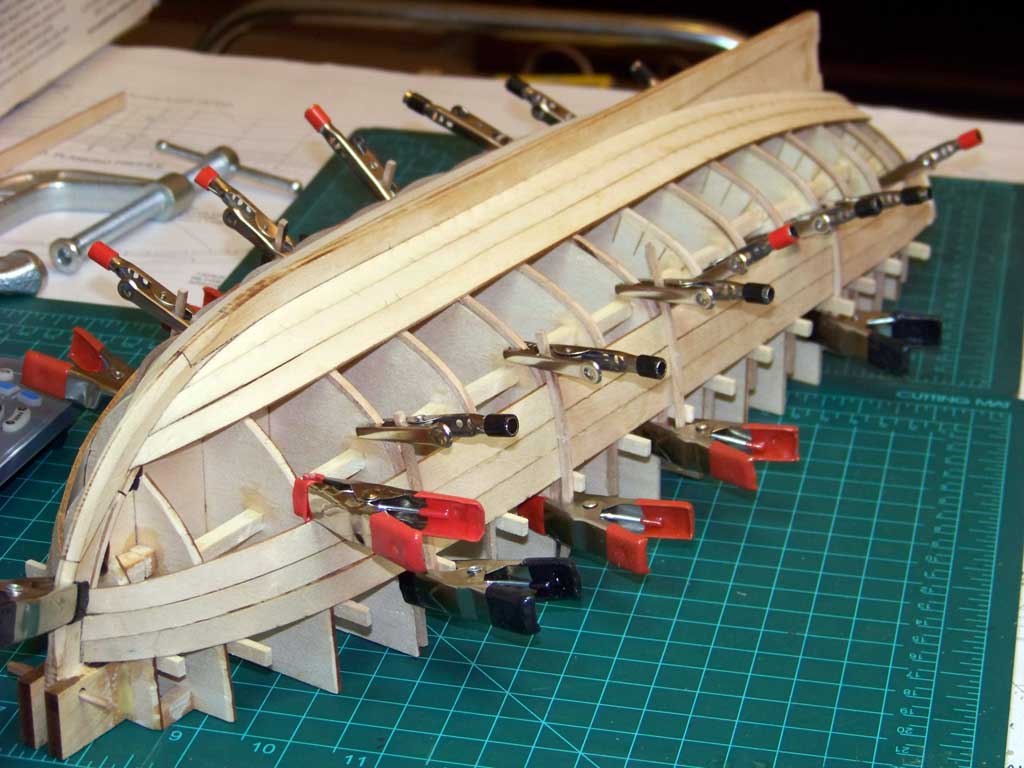
[Click for larger]
Once the final planks were in place, I trimmed off the excess plank length at the transom and gave the outside of the hull a rough sanding while it was still on the construction jig.
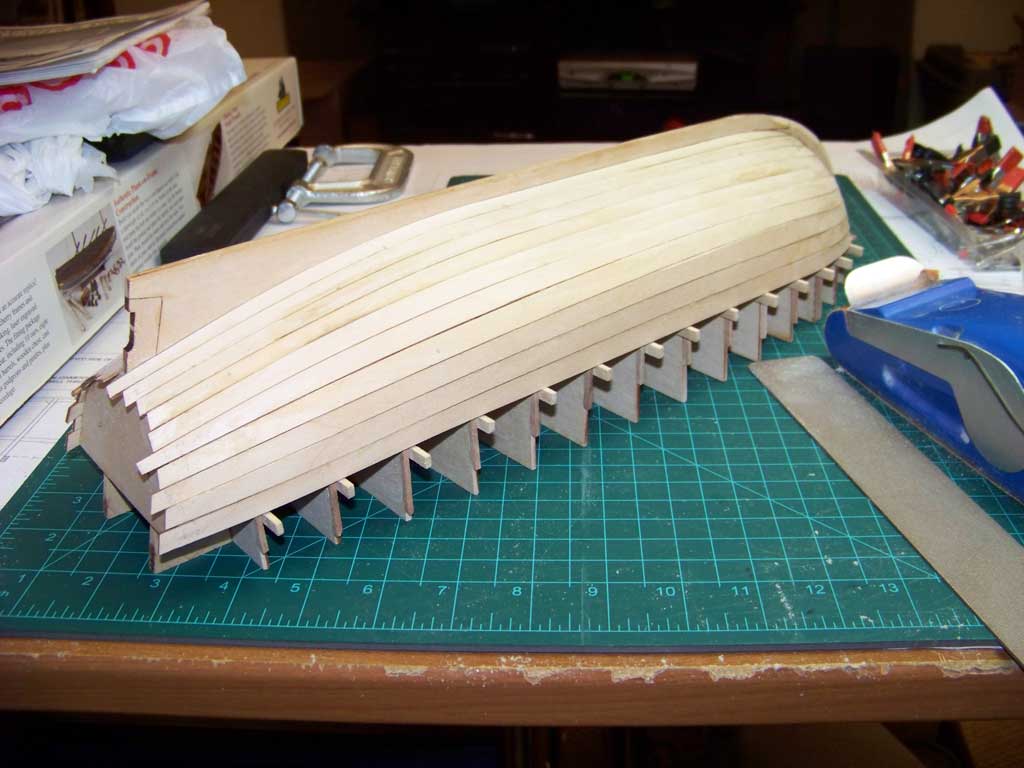
[Click for larger]
To conclude this phase of the project, I used an X-acto knife to carefully separate the frames from the places on the jig where they had been spot glued, above the sheer line. Then, after unpinning the transom and detaching the dowel at the stem, I was able to remove the hull from the jig. Fortunately, my glue control had been up to the task, and nothing stuck where it shouldn’t have — the hull popped right off, no muss no fuss.
[Click for larger]
It took all of five minutes to clean up the few drips of glue that had hardened inside the shell.
Next up: fitting the remaining frames.
Comments